Getting Started with TestQuality
Welcome to TestQuality — your command center for modern, collaborative, and insight-driven test management.
Whether you're managing manual testing, automation, or a blend of both, TestQuality brings clarity and control to your QA lifecycle. With native support for GitHub, Jira, Selenium, Jenkins, and more, it integrates seamlessly into your workflow — so you can focus on quality, not complexity.
How TestQuality Is Structured
TestQuality is built around how testers actually work — whether you're starting small or scaling across teams.
At the heart of everything lies the Test Case. Whether you're executing ad hoc, as part of a regression cycle, or tracing back to requirements — it all starts with the test case.
Core Flow: From Test Case to Insight
[Test Case] → [Run] → [Insights]
-
Test Case : Define steps, expected outcomes, and test data
-
Run : Execute the test and log results (manually or via CI)
-
Insights : See pass/fail trends, flaky tests, and coverage over time
💡 Every test you execute — whether ad-hoc or through a cycle, story, or plan — automatically creates a Run.
How Other Modules Enhance the Flow
These additional modules help you organize, structure, and scale your testing — but none are mandatory to get started.
| Module | Purpose | Required? | Example Use |
|---|---|---|---|
| Test Plan | Set scope, objectives, and release milestones | ❌ | Plan tests for a major release |
| Cycle | Group reusable test sets | ❌ | Create a smoke suite or sprint suite |
| Story | Link tests to requirements | ❌ | Map user stories to validation steps |
| Exploration | Log exploratory or ad-hoc test sessions | ❌ | Document session-based QA |
Everything Lives Inside a Project
All your work in TestQuality — from writing test cases to analyzing insights — is organized under a Project. Think of it as your QA workspace for a specific product, sprint, or team.
Project
├── Test Cases (core)
├── Runs (created whenever tests are executed)
├── Cycles
├── Test Plan
├── Stories
├── Explorations
├── Integrations (Jira, GitHub, CI/CD)
└── Insights
Tip: You can start simple with just Test Cases and Runs. As your testing evolves, layer in Cycles, Plans, and Stories to add structure and traceability.
Each Module Supports a Phase in STLC
TestQuality is aligned with the Software Testing Life Cycle (STLC), making it easy to plug into your team’s workflow — whether you're doing manual QA, automation, or both.
| STLC Phase | TestQuality Module(s) |
|---|---|
| Requirements Analysis | Stories |
| Test Planning | Test Plan |
| Test Design | Test Cases |
| Test Environment Setup | Environments & Resources, Integrations |
| Test Execution | Runs, Explorations |
| Test Closure & Reporting | Insights, Reports (from Run or Overview) |
TL;DR for New Users
If you’re just getting started, here’s all you need:
- Create a Test Case
- Run it → This creates a Run
- View results in Insights
When you're ready to level up:
- Use Cycles to group reusable test sets
- Use Test Plans to align testing with releases or goals
- Link test cases to Stories for traceability
- Log session-based testing with Explorations
Start small. Scale when you're ready.
Your First Walkthrough: Let's Run a Test
Now that you understand how TestQuality is structured, here’s how to put it into action — in just a few steps.
⏱️ Estimated time to complete: 5–7 minutes
Step 1: Create a Project
When you first log in to TestQuality, you’ll be prompted to create your first Project. This is your workspace where all test cases, runs, and reports will live. Assuming you've completed this step, let's dive right into your next operation.
Step 2: Create a Test Case
Test cases are the building blocks of TestQuality. You’ll define what you’re testing and what outcome you expect.
🎥 Watch video (1 min)
- Go to the Test Cases tab
- Click Create Test Case
- Fill in:
- Title: Login works
- Step: Enter valid username and password
- Expected Result: Dashboard loads
- Click Create
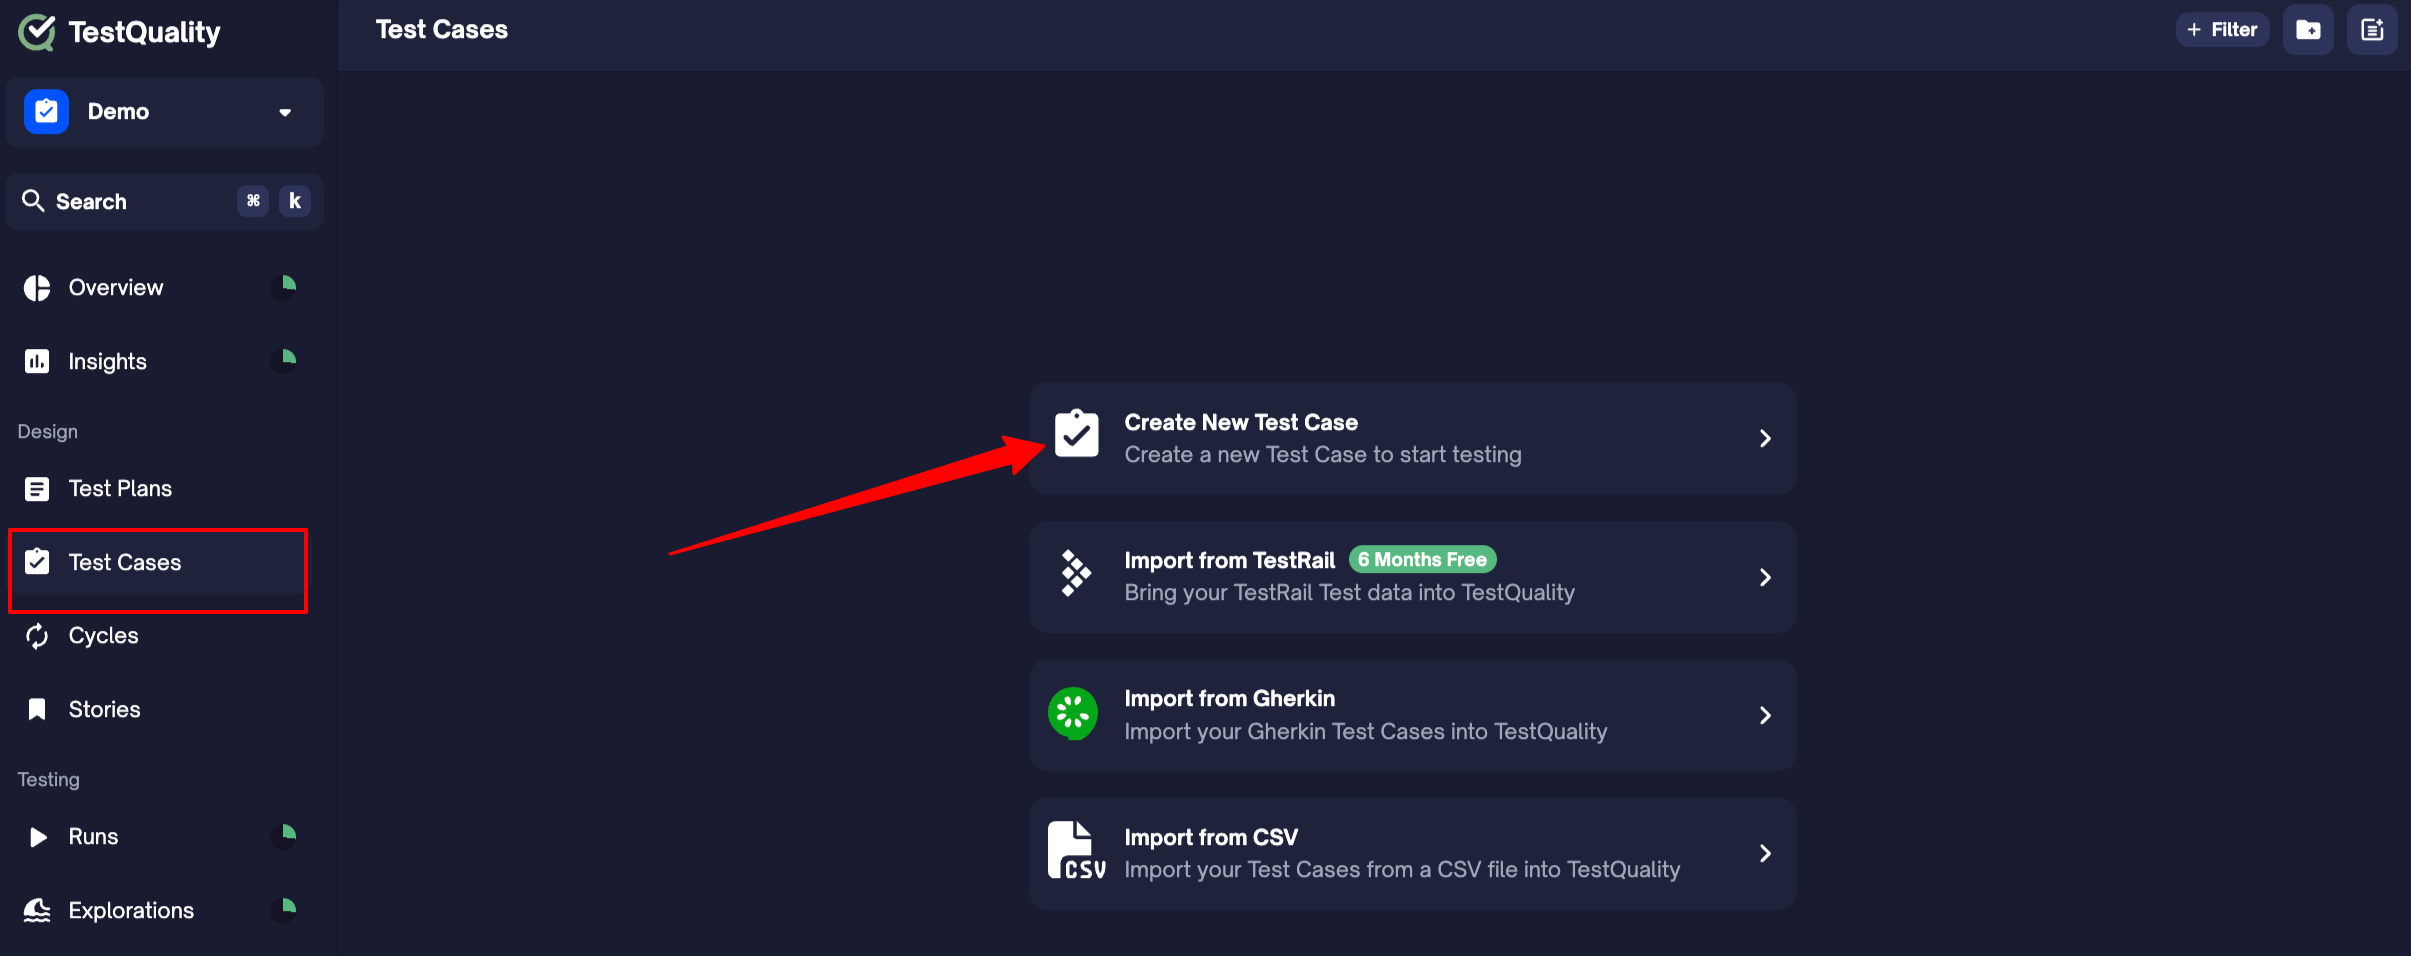
You can also add extra details like priority, tags, or assignee — totally optional at this stage.
💡 Smarter Test Case Generation with TestStory.ai
TestStory.ai is our in-house AI-powered test case generator — built by TestQuality’s co-founder, Michael — to make test design faster, smarter, and fully customizable.
Unlike other AI tools that produce generic cases, TestStory.ai fine-tunes results based on your chosen Test Settings — including testing strategy, user perspective, and output format — so you get only the test cases that fit your real project needs.
With TestStory.ai, you can:
- Import issues and stories directly from Jira, GitHub, or Linear
- Guide AI through Test Settings for accurate, context-aware results
- Save and reuse custom preset packs for different projects or teams
- Export or share test cases (PDF, CSV, or Markdown)
- Seamlessly sync with TestQuality — just click the TestQuality button, choose your project, and your generated tests appear instantly
- Submit feedback and bug reports directly in the app
Who can use it?
- TestQuality customers: Log in with your existing TestQuality email — it’s included in your subscription with 500 free credits/month
- Not a TestQuality user yet? Try it for free with 50 credits/month — no setup required
👉 Try TestStory.ai — generate the right test cases, not just any test cases.
Step 3: Create a Run
A Run is where you actually execute your test case and record the results. Every time you execute a test — manually or through CI — a Run is created.
- Go to the Test Cases tab
- Select the test case you just created
- Click the Run button from the bottom toolbar
- In the dialog that opens:
- You can leave the defaults as-is for now
- Click Create to launch the run
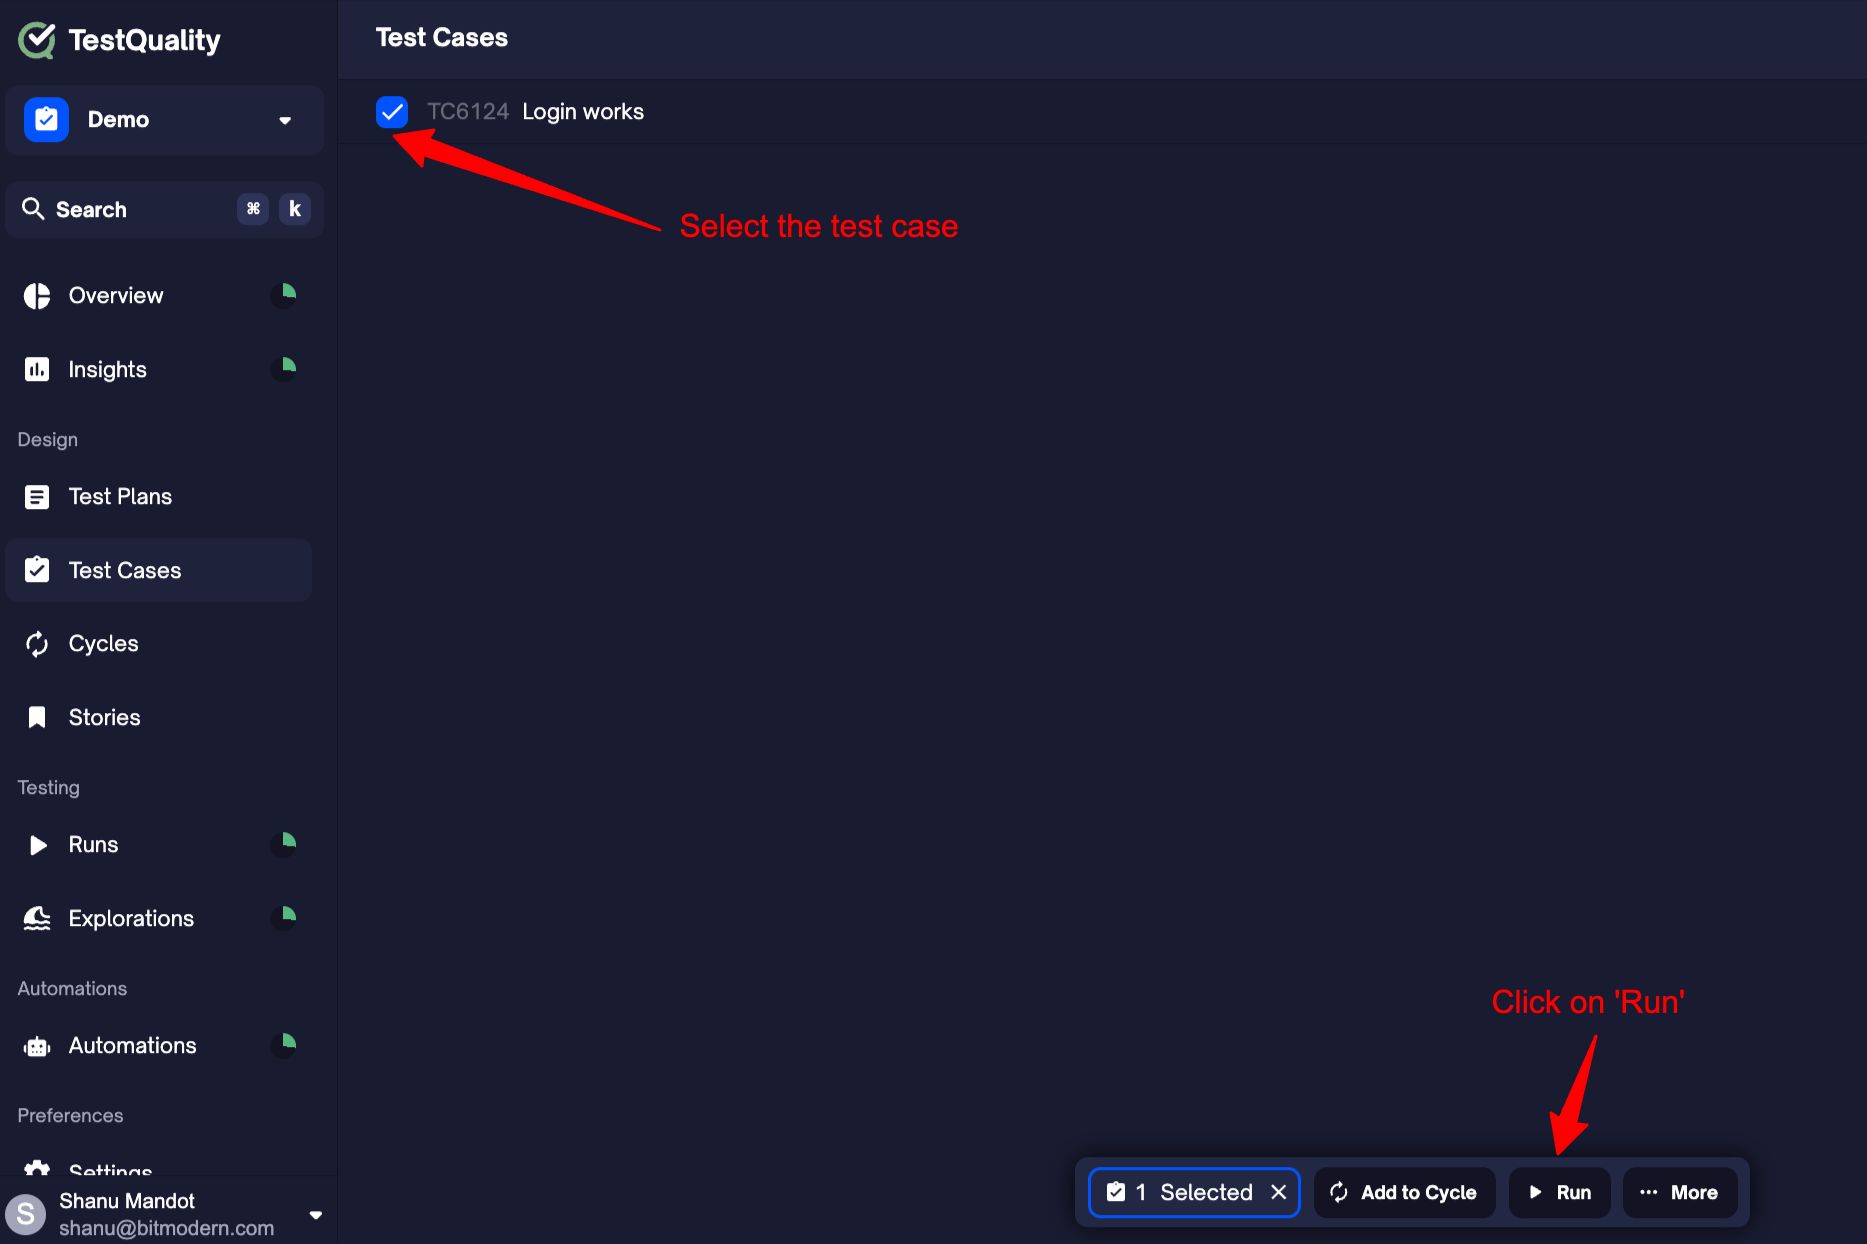
💡 A Run captures the context and results of your test execution. You can create runs manually, from cycles, or even through automation later.
Step 4: Execute the Run
Now that you've created a run, it's time to perform the actual test and record what happened.
- Go to the Runs tab
- Open the run you just created and navigate to 'Tests' tab
- Click into the test listed inside the run
- In the drawer that opens:
- Enter the Actual Result (e.g., "Dashboard loaded successfully")
- Choose the Status (Pass, Fail, Blocked, etc.)
- Click Save
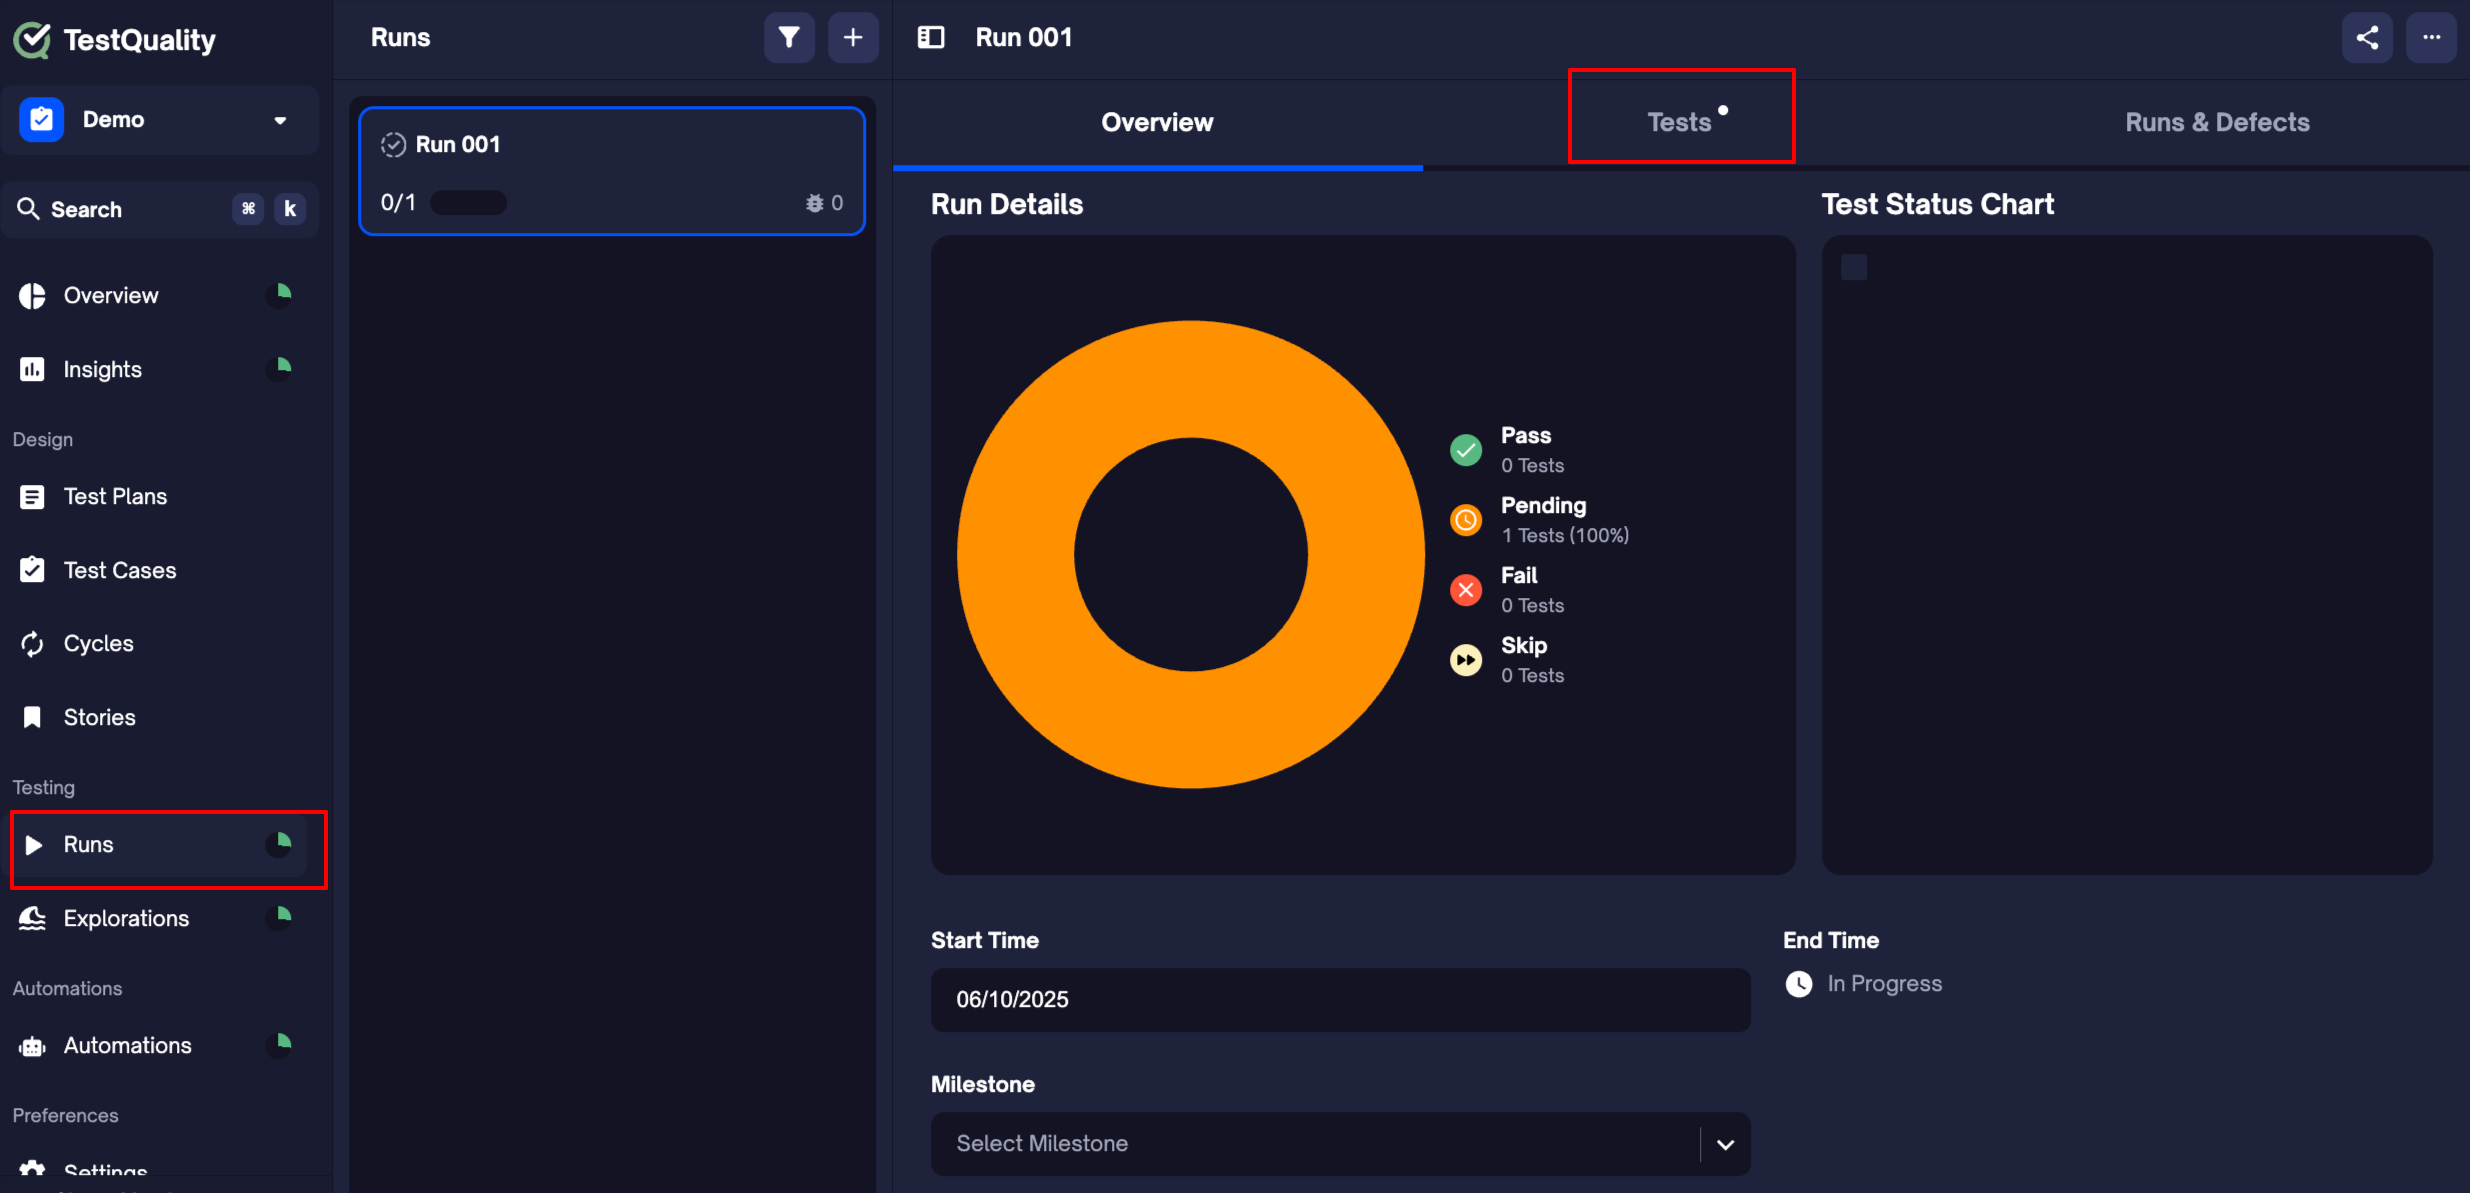
💡 You can also add attachments, comments, or defect links here — but they’re optional for now.
Step 5: Complete the Run
Once you've executed all the test cases in a run, you’ll need to mark the run as complete. This locks in the results and enables report generation.
You have two options:
Option 1: From the Run view
- After executing the last test case, a popup will appear
- Click Complete Run
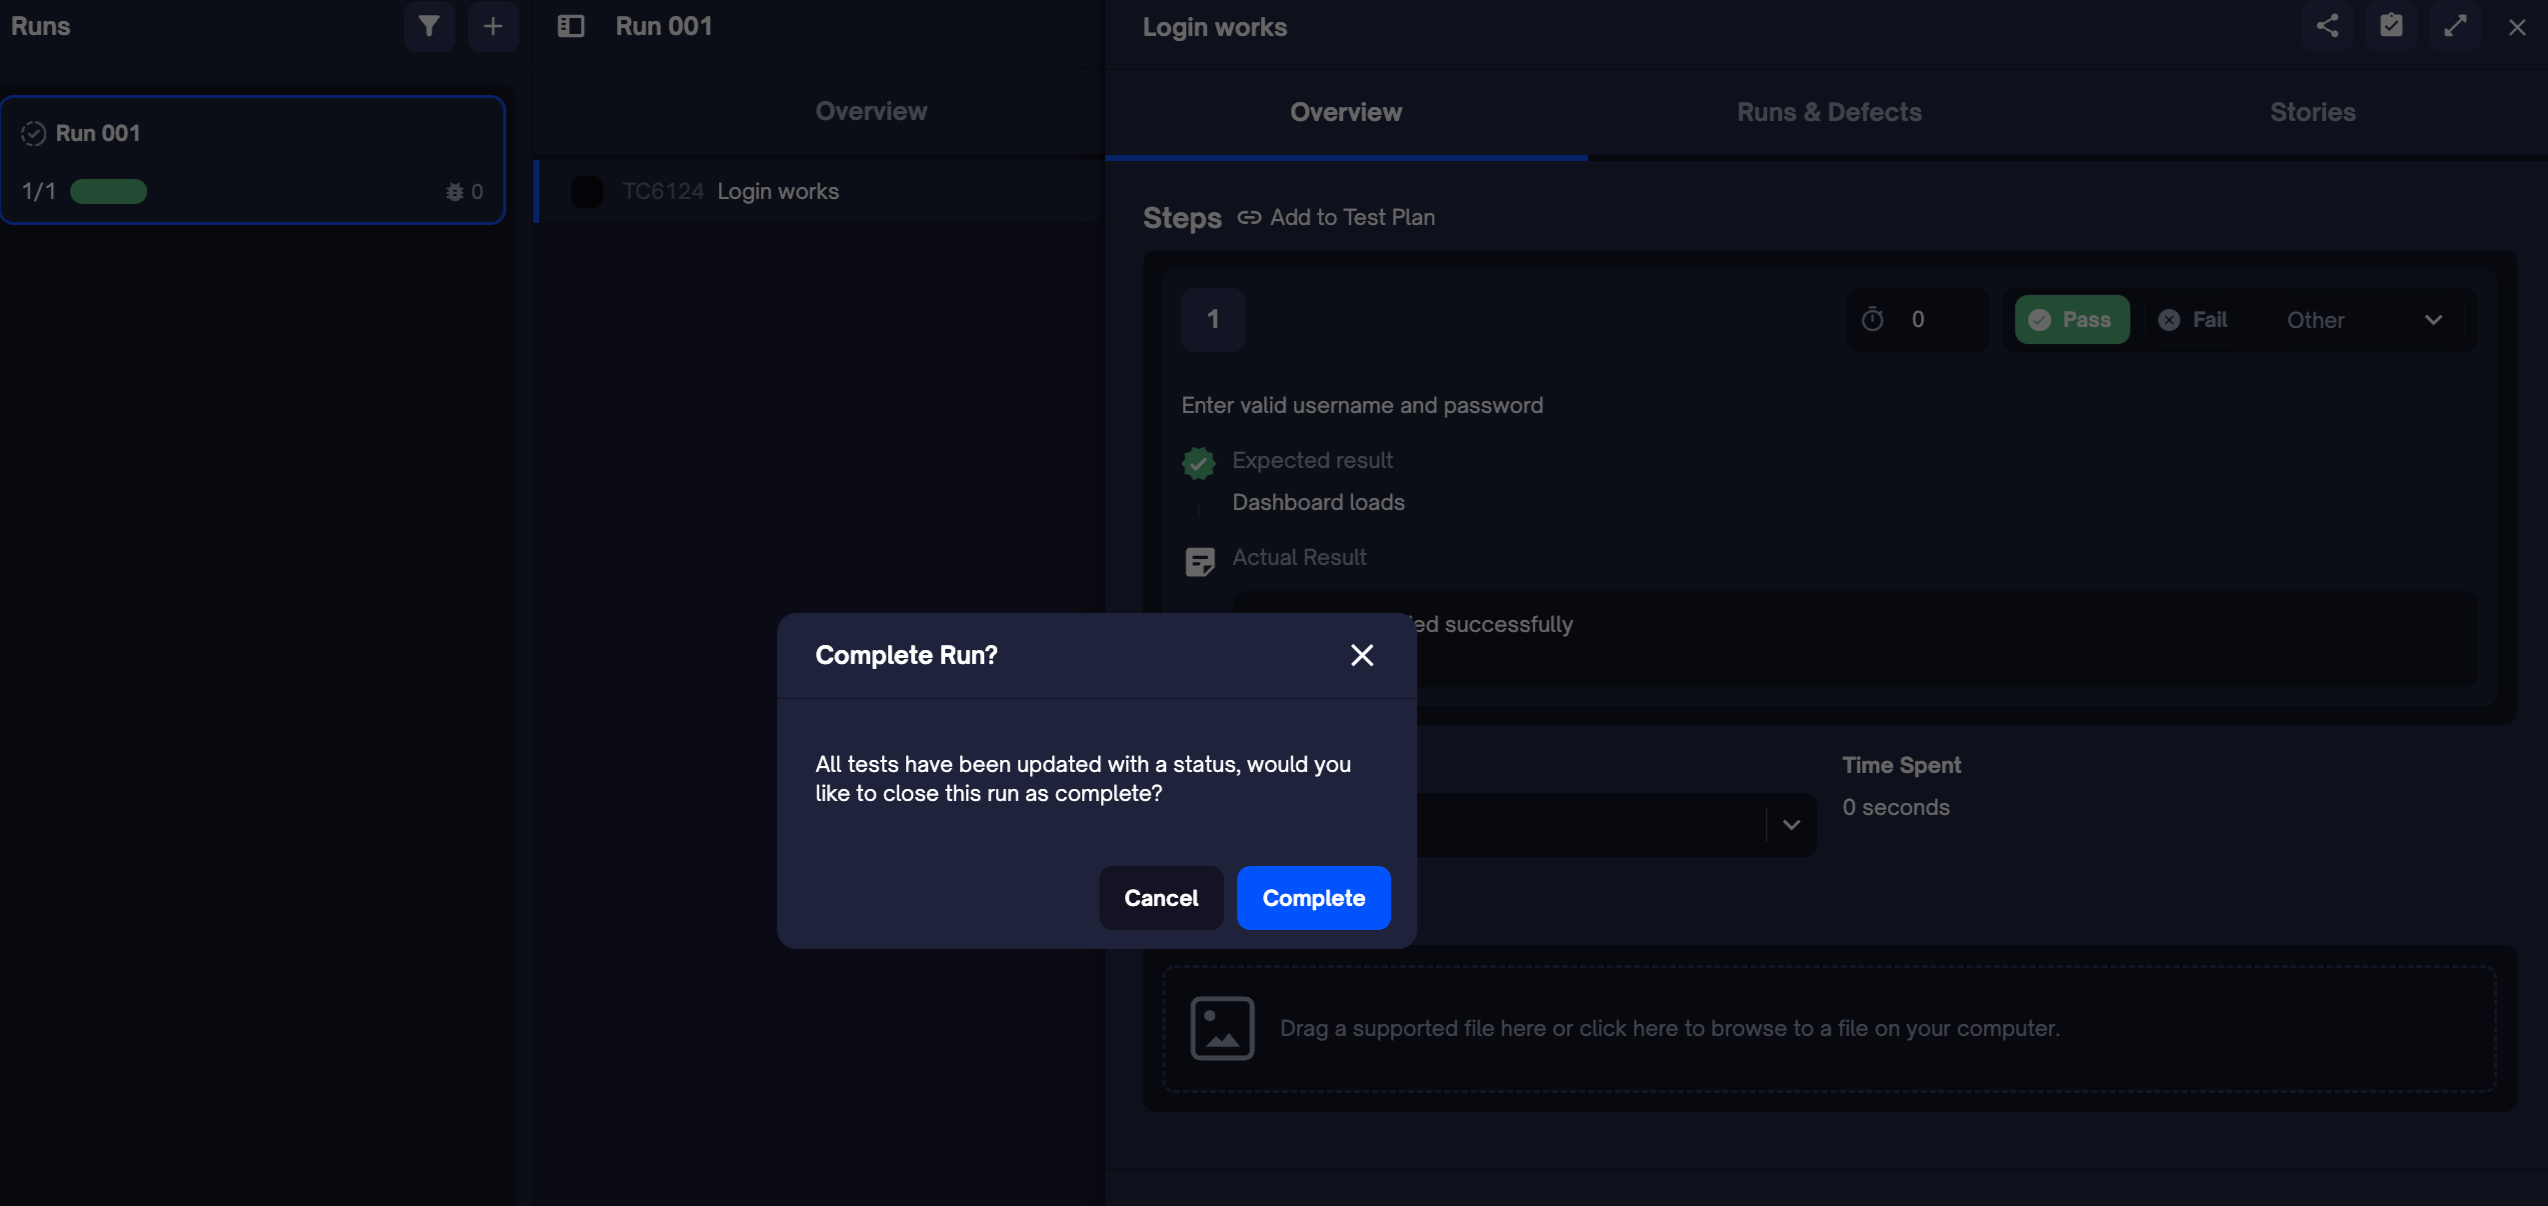
Option 2: From the menu
- In the Runs tab, locate your run
- Click the three-dot menu (⋯)
- Select Finish Run
💡 You can still reopen the run later if you need to make changes — unless your team enforces run locking via settings.
Step 6: Generate a Report
Once a run is completed, you can export a professional PDF report — perfect for sharing results with your team or stakeholders.
- Go to the Runs tab
- Open the completed run
- Click the three-dot menu (⋯) in the top right
- Select PDF Report

The report includes all test results, execution timestamps, status breakdown, and any comments or attachments.
Step 7: Share the Report
Once you've generated a run report, you can easily share it with your team or stakeholders for visibility and collaboration.
- Open the completed run
- Click the Share icon at the top of the page
- Choose one of the following:
- Invite teammates via email
- Copy shareable link to send directly
- (Optional) Adjust permissions to control who can view or edit the report

All shared reports respect your project’s permission settings to ensure secure access.
Step 8: Review Insights
The Insights tab gives you real-time visibility into test performance, quality trends, and flaky test patterns — all without setup.
- Go to the Insights tab
- View:
- Pass/fail trends
- Test coverage across cycles, runs, and milestones
- Flaky test indicators
- Use filters to zoom in on specific tests, cycles, or tags
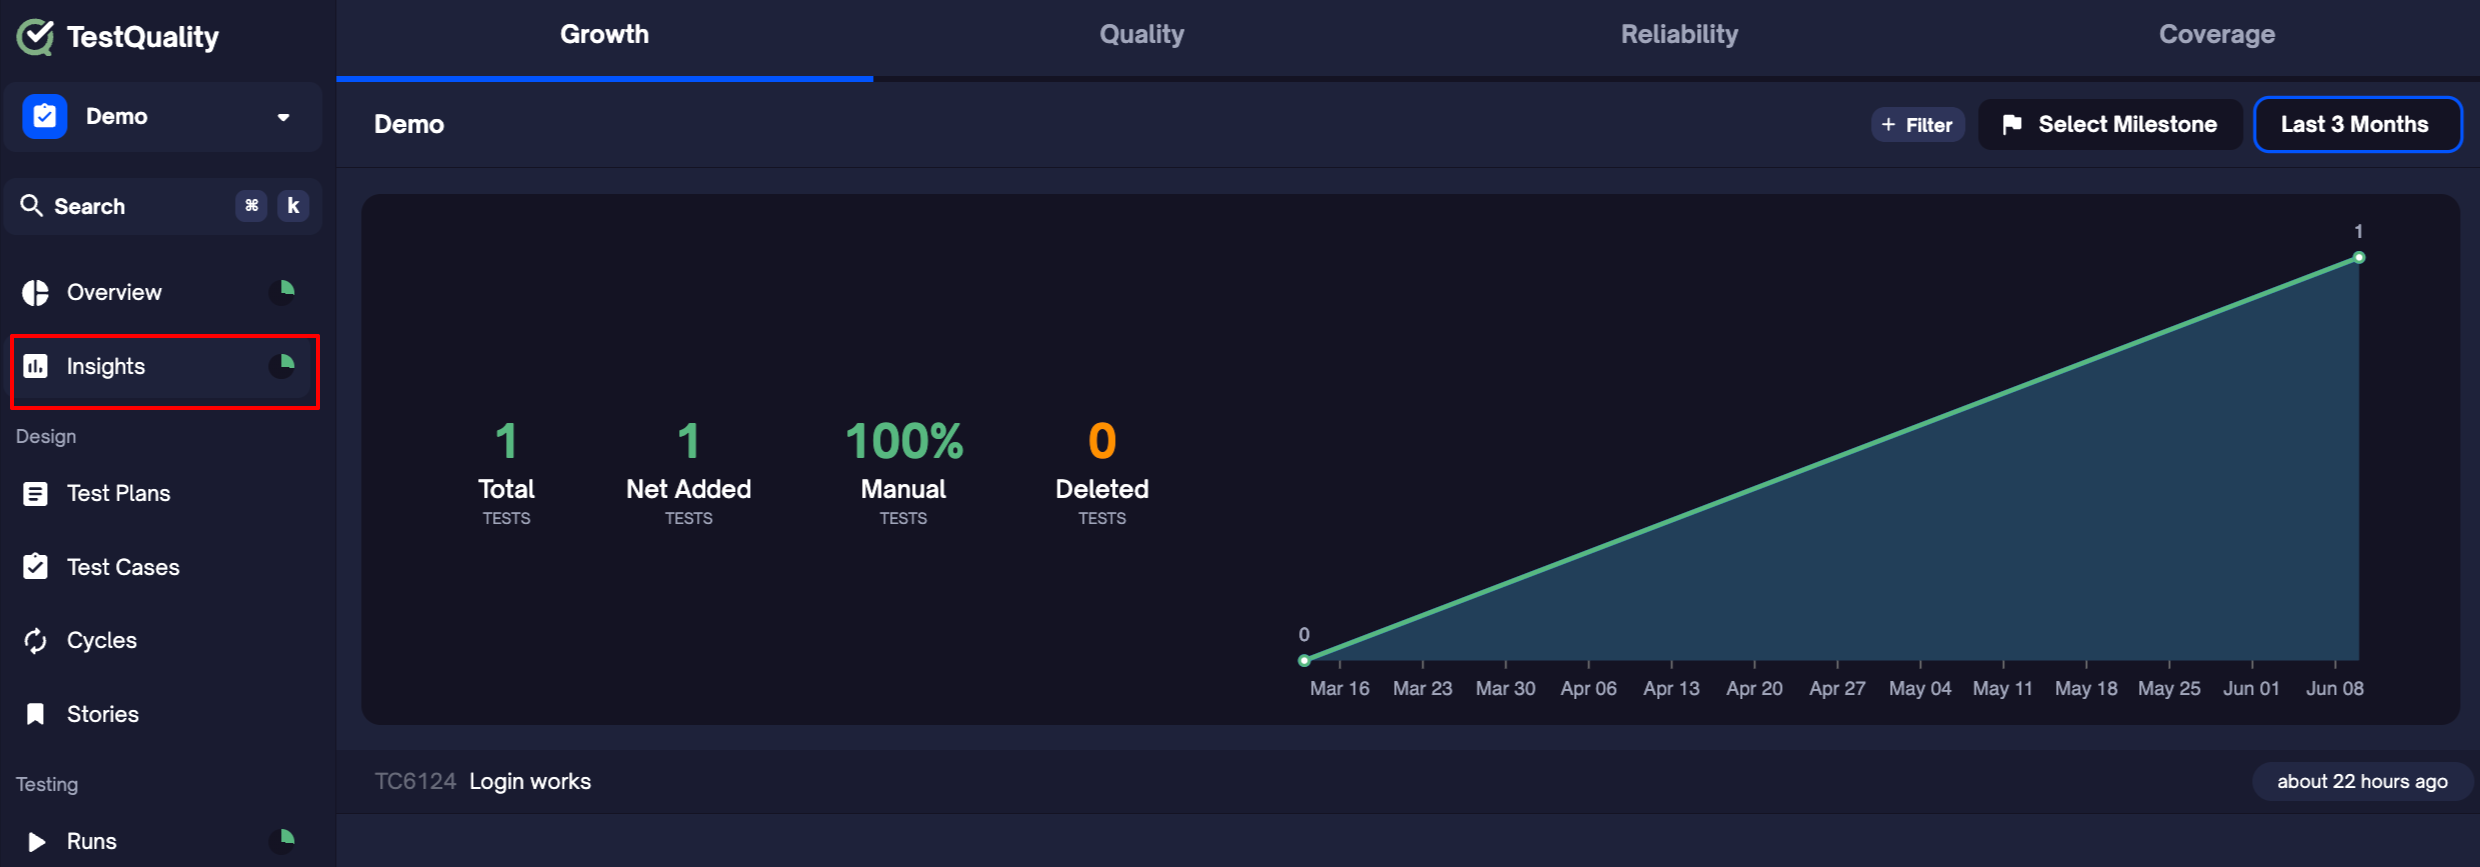
💡 You don’t need to configure anything �— data flows in automatically as you run tests.
What’s Next?
Once you’ve completed your first test run, here’s what you can explore next: